Add an Asset
Assets can be created one of two ways. (Option 1) The system can create a pending asset via a purchase order or an accounts payable invoice or (Option 2) an asset can be manually keyed into the system through asset service or via a procurement item used to create the asset.
Option 1
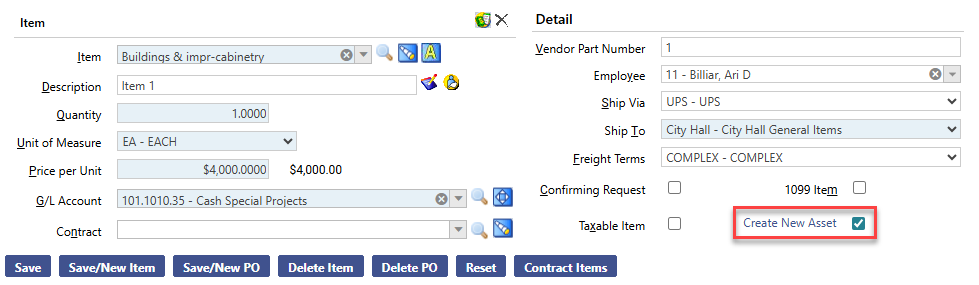
When you enter a purchase order or an accounts payable invoice and select a fixed asset item from the item list, the Create New Asset check box will be selected. This creates a pending asset in asset service.
To modify the information about an asset created from the procurement or accounts payable modules, access the Asset Service page and perform an advanced search for assets in pending mode that have not been recorded. Click the asset folder to open it and then click the Edit button in the upper right-hand corner of the General pane.
Option 2
To manually key an asset into the system, follow the steps below:
- Go to Financial Management > Asset Management > Asset Service.
- Click New. The Add Asset pop-up page appears, which allows authorized users to enter the required general information for a new asset.
- In Item, select one of the procurement items that was previously set up as a fixed asset item. Only items flagged as fixed asset items appear in the drop-down list.
- The Classification field will only be displayed if the Enable Auto-Assign G/L Distribution Profile Functionality check box has been selected on the Asset Management tab on the Company FM Settings page. This field will be populated when the Item is selected. It is not an editable field.
- In Asset Number, enter a unique identifier for the asset; this field is alpha-numeric so take this into consideration when numbering assets (i.e., zero fill short numbers).
- The G/L Organization field will only be displayed if the Enable Auto-Assign G/L Distribution Profile Functionality check box has been selected on the Asset Management tab on the Company FM Settings page. This field is required.
- The G/L Distribution Profile field will only be displayed if the Enable Auto-Assign G/L Distribution Profile Functionality check box has been selected on the Asset Management tab on the Company FM Settings page. This field is required.
- In Original Funding Source, select the different funding sources (e.g., gifts or grants). These values are defined in Validation Set 74. Press CTRL and click the field to open the Validation Set Values List dialog box where you can add or edit a validation set.
- In Acquisition Date enter or select the date the asset was acquired; this will also be the default capitalization date.
- In Original Purchase Price enter the purchase price/value of the asset.
- In Description, type the description of the asset; this is also the asset name.
- In Quantity enter the quantity for the asset, which must be at least 1 for an asset to be recorded. When a pending asset is created from procurement or accounts payable and has a quantity greater than 1, it must be split prior to being recorded.
- Click OK. The Asset Service screen displays where you can confirm and modify the asset information.
See also: